FamiEyes Support: Monitor Devices with Others' Permission.
Navigating the intricacies of your iPhone to locate hidden messages may seem daunting, yet it's a vital skill in today’s digital age. Whether you're looking to manage your notifications more efficiently or simply curious about the "how to find hidden messages on iPhone" process, understanding the steps to conceal or reveal these messages is essential.
Best Methods to Find Hidden Messages on iPhone
Why People Hide Messages on iPhone
People choose to hide messages on their iPhones for a myriad of reasons, each stemming from personal or practical needs. Here are some of the primary motivations:
Privacy and confidentiality: Many users hide messages to protect sensitive information from being accessed by others who might use their phone. This includes personal conversations, business communications, or any information that could be considered private.
Minimizing distractions: To maintain focus during work or personal time, some users prefer to hide message alerts. This helps in avoiding interruptions from non-urgent texts and maintaining productivity.
Emotional well-being: For some, certain messages can trigger anxiety or emotional distress. Hiding these messages can help manage mental health by controlling when and how they engage with potentially upsetting content.
Additionally, it's crucial to understand that hiding messages isn't always indicative of deceit. It can be a practical approach to managing communication flow and personal space within digital interactions. Hence, can you unhide messages on iPhone? In the following sections, you’ll learn to know how to see hidden messages on iPhone.
Method 1: Find Messages from Unknown Senders
To effectively manage and view messages from unknown senders on your iPhone, you can start by adjusting your settings to filter messages from unknown senders into a separate list, making it easier to review them at your convenience.
- Step 1: Navigate to “Settings” > “Messages”. Turn on the “Filter Unknown Senders” option. This action segregates messages from unknown contacts into a separate list, ensuring they do not mix with messages from known contacts.
- Step 2: Open the Messages app. Tap on “Filters” located at the top-left corner, then select “Unknown Senders”. Here, you can view all messages sent by contacts not saved in your phonebook.
- Step 3: If you're not receiving alerts for these filtered messages, check if the “Filter Unknown Senders” is activated in your iPhone's settings.
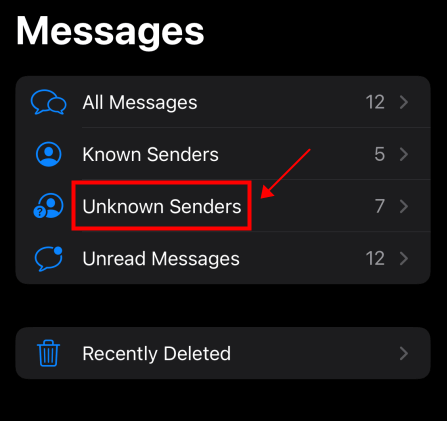
iOS 16 enhances message filtering capabilities. You can choose from different inbox filters such as “All Messages”, “Known Senders”, “Unknown Senders”, and “Unread Messages” to better organize your messages.
Method 2: KidsGuard Pro: All-in-one Text Tracker on iPhone
KidsGuard Pro stands out as a versatile text tracker and family location app compatible with iOS and iPod touch. Available in a wide array of languages such as English, Spanish, Japanese, and more, it caters to a global audience. What’s more, it enables you to see all the sent and received text messages, with those hidden ones included. Here’s a detailed look at its features and functionalities:
- Step 1: Sign up for a new account and choose a suitable plan based on your requirements;
- Step 2: When you have placed the order, check your inbox for a confirmation email. What’s included as well is the guide to download and install the app on iOS;
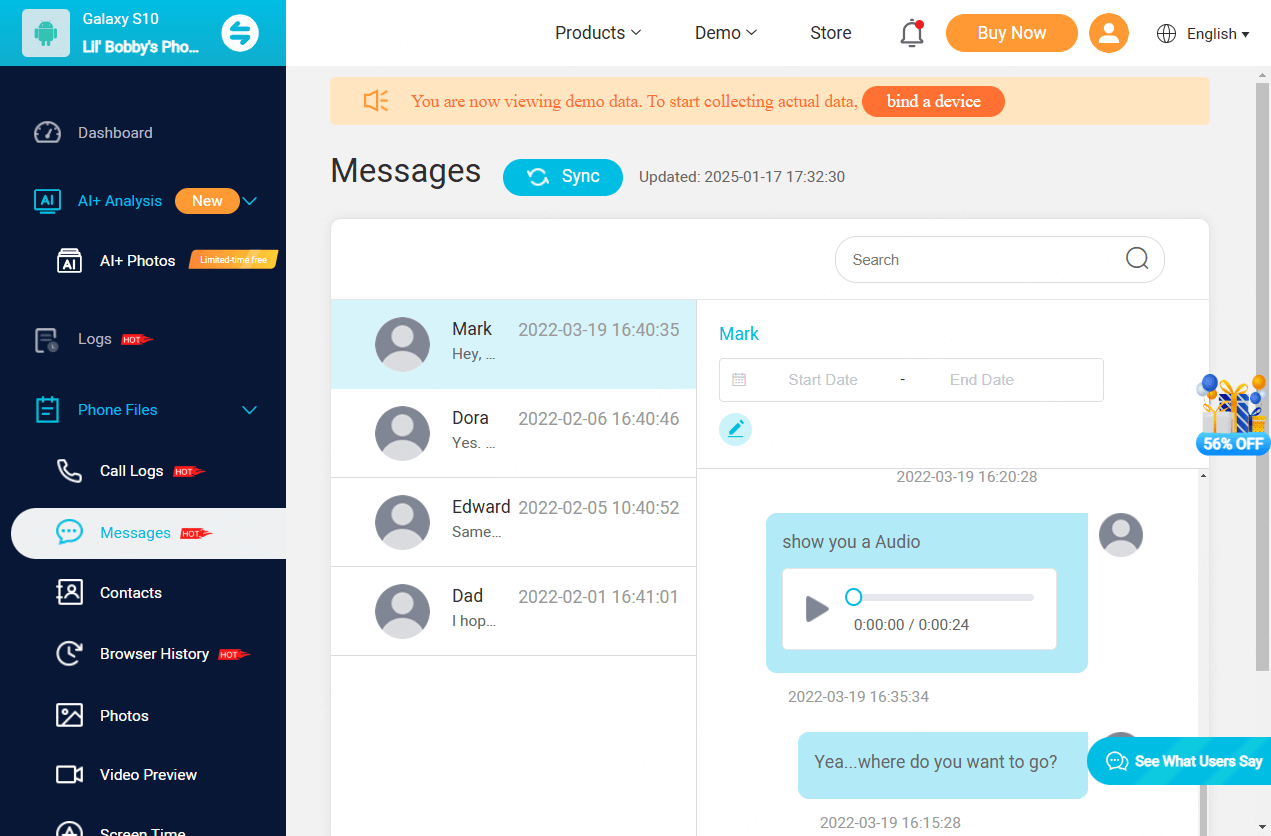
- Step 3: After this, go to the official website and enter the online dashboard. On the left column, click “Messages” to see all the exchanged text messages, including hidden ones.
Method 3: Use Spotlight Search to Uncover Messages
In addition to managing messages from unknown senders through settings, you can also utilize Spotlight Search on your iPhone for efficient organization and quick access. Spotlight Search allows you to search through various content on your device, including messages, contacts, apps, and more.
- Step 1: Swipe down from the middle of the Home Screen or Lock Screen. Enter the name of a contact or a specific keyword related to the hidden message you're looking for.
- Step 2: Activate Siri by holding down the Home button or saying "Hey Siri." Command Siri to search for messages by saying, "Search for messages from [contact name]" or "Find messages about [keyword]".
- Step 3: If deleted messages continue to appear in search results, consider adjusting your Spotlight settings. Navigate to “Settings” > “General” > “Spotlight Search”, disable and re-enable Messages, or use the “Edit” button in “Messages” to manually delete lingering texts.
Notice: In iOS 16.2 and later, enhance your search capabilities within the Messages app. Swipe down from the list of conversations to reveal the search field, type your query, and tap search. This allows you to search across conversations and even within images. For users with iOS 17 and later, apply multiple filters to narrow down search results. Filters can include specific people, content types like photos or links, and keywords.
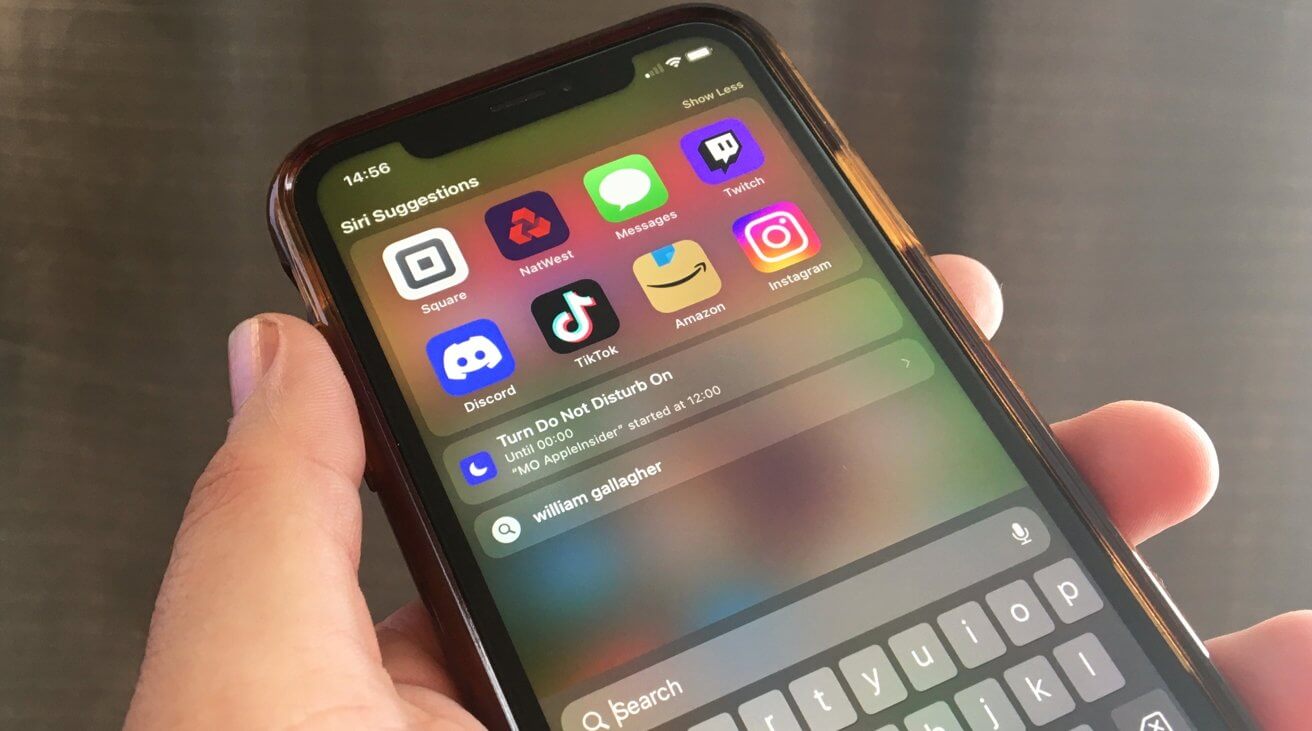
By leveraging Spotlight Search and these additional tips, you can efficiently find hidden or accidentally deleted messages on your iPhone.
Method 4: Unhide Secret Messages via iCloud or iTunes Backup
Retrieving hidden messages on your iPhone can be accomplished through iCloud or iTunes backups, depending on your previous settings and needs. Here's how to proceed with each method:
iCloud Backup
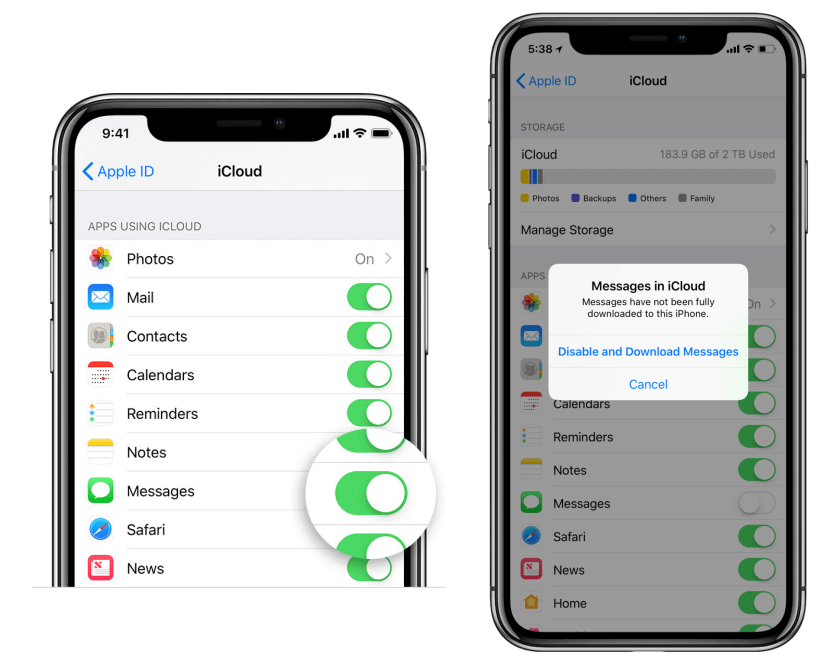
- Step 1: Go to “Settings”, tap on your name, select iCloud, and then iCloud Backup. Confirm if the last backup date precedes the deletion of your messages.
- Step 2: After confirming the backup date, navigate back to “Settings”, tap “General”, then “Reset”, and select “Erase All Content and Settings”. Follow the prompts to erase your device. Once erased, begin the setup process and select “Restore from iCloud Backup” on the Apps & Data screen. Enter your Apple ID, select the appropriate backup, and proceed with the restoration.
- Step 3: Once the restoration is complete, check your messages to see if the deleted texts have reappeared.
iTunes backup
- Step 1: Connect your iPhone to your computer and open iTunes. Select your device icon in the top left corner.
- Step 2: Navigate to the Summary section and click on “Restore Backup”. Choose the most relevant backup that includes the deleted messages. Click Restore and enter your password if prompted.
Method 5: Check Archived Text in Messaging Apps
Sometimes, messages are archived rather than deleted. To manage archived messages effectively on your iPhone, it is essential to understand the different methods available across various apps since the Apple Messages app does not support archiving. Here's how you can handle archived messages in several common applications:
Google Voice:
- Step 1: Select the messages you wish to archive and click “Archive” to remove them from the main list.
- Step 2: Navigate to “Main Menu” > “Archive”, select the desired messages, and click “Restore” to bring them back to the main list.
- Step 3: To permanently remove messages, select them and click “Delete”.
Emails:
- Step 1: Ensure your email account supports archiving. To archive, tap and hold the “Archive” button, then select “Archive Message” from the pop-up menu.
- Step 2: Open the Mail app, navigate to the Mailboxes screen, select your email account, and tap “All Mail” to view archived emails.
Social and Messaging Apps:
WhatsApp: To view archived chats, open WhatsApp, tap on “Chat”, then locate and tap the “Archived Chats” section.
Facebook Messenger: Open the app, tap your profile in the top-left corner, and select “Archived Chats” to access archived messages.
Understanding these methods allows you to efficiently manage your archived messages across different platforms, ensuring that you can always access or clear your stored communications as needed.
Conclusion
Through this guide, we've explored a variety of methods to manage and uncover hidden messages on your iPhone, from utilizing in-built settings for sorting unknown sender messages to employing advanced features like Spotlight Search for more in-depth retrieval efforts.
If you need to figure out what’s been hidden from your beloved ones’ iOS devices, KidsGuard Pro is really a great tool to dispel your worries. Just take a look at the free demo now.
Click a star to vote
